Suppliers
Suppliers is the vendor master for your procure-to-pay cycle. It shows what you owe each supplier, groups them by category and currency, and gives every supplier a 360 profile with a statement of account, their bills, purchase orders and the payments you have made. The same data drives the Vendors and Bills views inside Accounting.
The supplier list
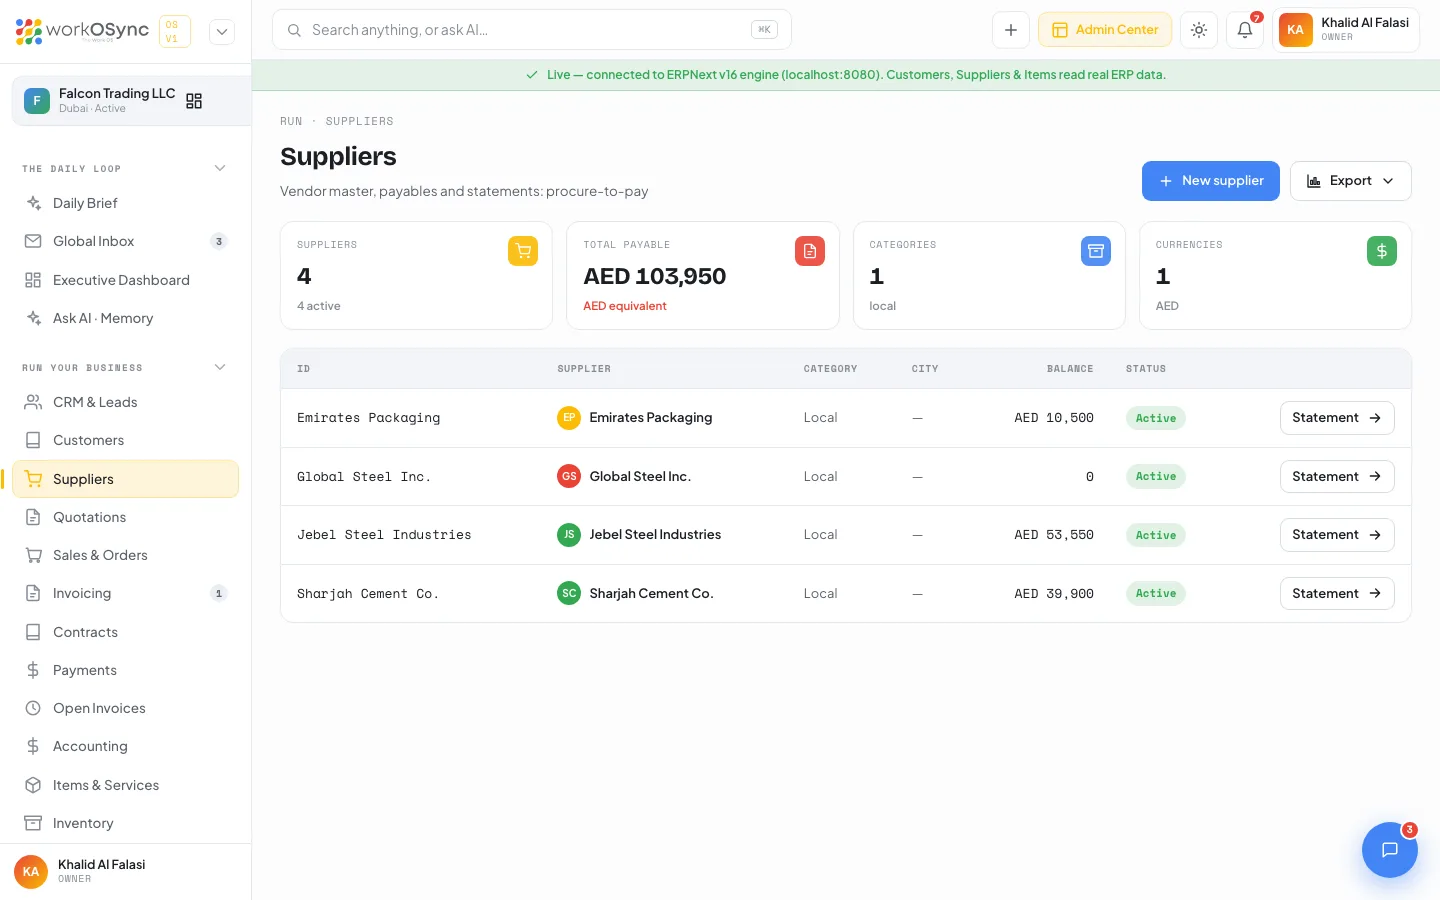
Open Suppliers from the sidebar (/suppliers). The page is titled Suppliers with the subtitle Vendor master, payables and statements: procure-to-pay. The header carries a New supplier button and an Export menu.
KPI tiles
| Tile | What it shows |
|---|---|
| Suppliers | The number of suppliers in the master, with {n} active underneath. |
| Total payable | Sum of every supplier balance in AED; non-AED balances are converted at 3.67 (AED equivalent). |
| Categories | How many supplier categories are in use, naming the first two (for example raw materials · packaging). |
| Currencies | How many purchasing currencies you deal in, listed underneath (for example AED · USD). |
Table columns
| Column | Meaning |
|---|---|
| ID | The supplier code, for example SUP-0001 in demo mode or the ERPNext supplier name when connected. |
| Supplier | The company name. Links to the profile. |
| Category | The supplier group, such as raw materials or packaging. |
| City | Where the supplier is based. |
| Balance | What you currently owe, in the supplier's currency (0 when settled). |
| Status | Active or Disabled. |
| Statement → | Opens the profile on the statement of account. A supplier added in demo mode shows a New badge and a Remove button here instead. |
Statuses
| Status | Meaning |
|---|---|
| Active | You can raise purchase orders and record bills against the supplier. |
| Disabled | The supplier is switched off in the engine; history stays visible but no new documents should be raised. |
Export
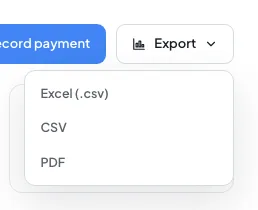
Export offers Excel (.csv), CSV and PDF, with the columns ID, Supplier, Category, City, Balance, Currency and Status. The Excel option adds a UTF-8 byte-order mark so names open correctly; PDF opens a print window you can save from. See Exports and printing.
New supplier
New supplier opens a centred New supplier modal (click outside or press Escape to close it):
| Field | Default and options |
|---|---|
| Supplier name (required) | Placeholder e.g. Gulf Packaging Industries. Saving without it shows Supplier name is required. |
| Category | Defaults to Raw Material. Options: Raw Material, Packaging, Services, Logistics, Equipment, Utilities. |
| Currency | Defaults to AED. Options: AED, USD, EUR, SAR, INR. |
| City | Defaults to Dubai. |
| Phone | Placeholder +971 …. |
Placeholder accounts@supplier.ae. |
Create supplier writes an ERPNext Supplier (a Company in the chosen supplier group, country United Arab Emirates, with the default currency) and confirms with Supplier {name} created. City, phone and email stay on the form and are not written to the supplier record yet. In demo mode the modal notes that the supplier is kept in this workspace: it appears at the top of the list with a New badge and the message Supplier {name} added (saved in this workspace).
The supplier 360 profile
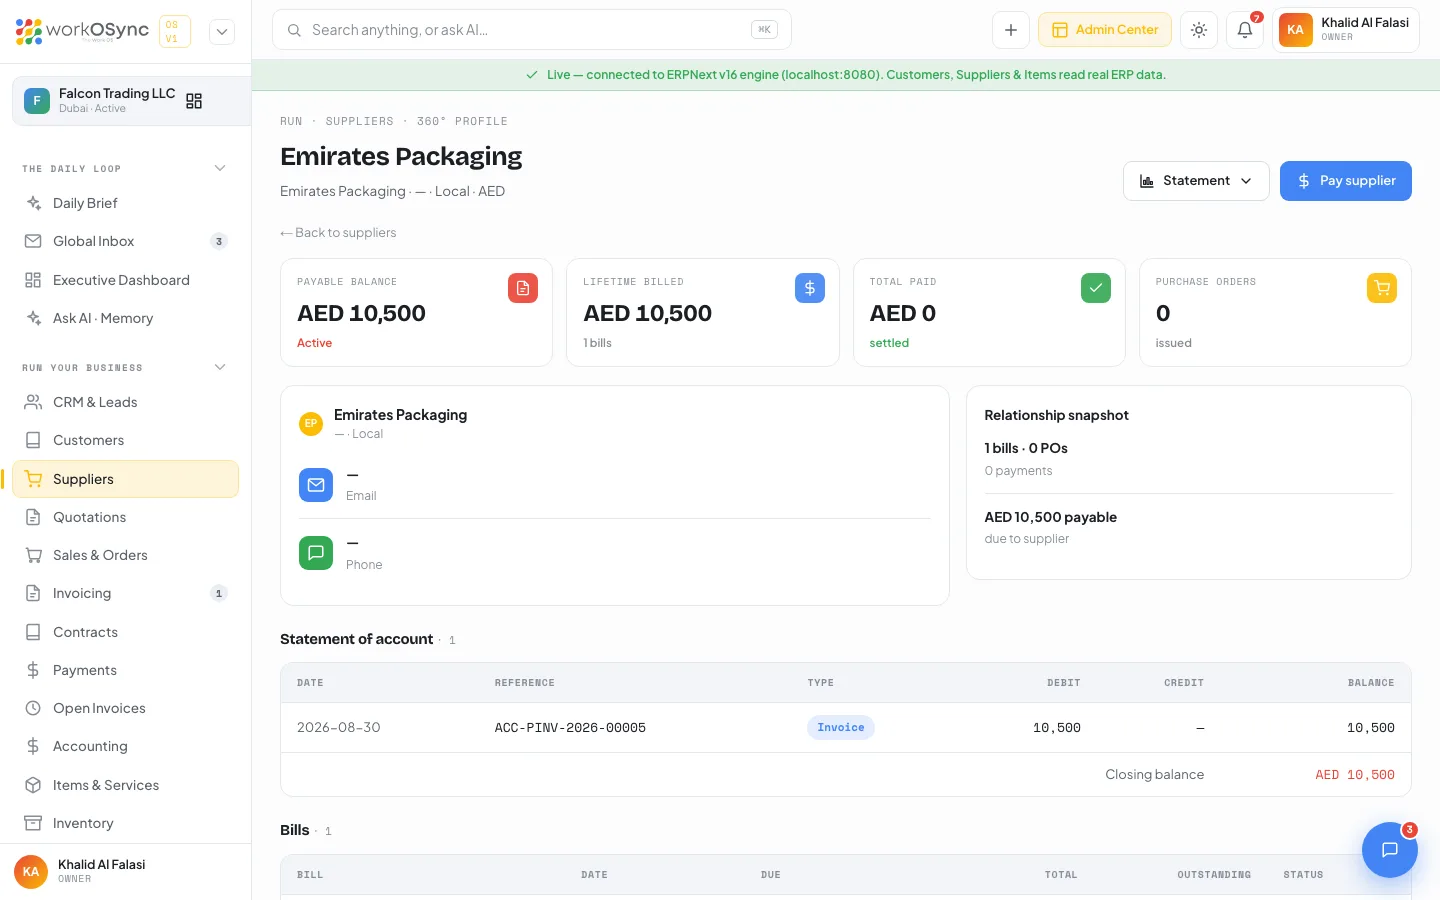
Click a supplier to open its profile. The breadcrumb reads Run · Suppliers · 360° profile and the subtitle shows {ID} · {city} · {category} · {currency}. The header shows a Statement export menu and a Pay supplier button, plus a ← Back to suppliers link.
- Statement offers Excel (.csv), CSV and PDF of the statement of account (Date, Reference, Type, Debit, Credit, Balance). PDF opens a print window headed Statement of account: {supplier}; save it as PDF from the print dialog. The menu is disabled while the statement is empty.
- Pay supplier opens the payment modal described below.
KPI tiles
| Tile | What it shows |
|---|---|
| Payable balance | What you owe this supplier right now. |
| Lifetime billed | The total of every bill received, with the number of bills. |
| Total paid | Everything settled to date. |
| Purchase orders | The number of purchase orders issued to the supplier. |
Two cards follow: a contact card with Email and Phone, and a Relationship snapshot summarising the account.
Sections
Each section shows None yet. until it has data.
| Section | Columns |
|---|---|
| Statement of account | Date, Reference, Type, Debit, Credit, Balance, ending with a Closing balance row. Bills debit the account; payments credit it. |
| Bills | Bill, Date, Due, Total, Outstanding, Status. |
| Purchase orders | PO, Date, Total, Status. |
| Payments made | Payment, Date, Mode, Against, Amount. Payments recorded in demo mode appear first with a New badge. |
Pay supplier
Pay supplier opens a modal titled Pay {supplier}:
| Field | Default and options |
|---|---|
| Against bill | On account (no specific bill), or one of the supplier's open bills shown as {bill} · {currency} {outstanding}. The first open bill is pre-selected; choosing a bill fills the amount with its outstanding balance. |
| Amount ({currency}) | Pre-filled with the selected bill's outstanding, or the payable balance when there is no open bill. Must be greater than zero (Enter an amount greater than zero.). |
| Payment date | Defaults to today. |
| Mode | Defaults to Bank transfer. Options: Bank transfer, Cash, Cheque, Credit card. |
| Reference # | Transfer or cheque number. |
The modal footnote reads Posts a supplier Payment Entry and reduces the payable balance of {currency} {balance}. Record payment posts an ERPNext Payment Entry of type Pay against the supplier (from the Cash account to Creditors), allocated to the chosen Purchase Invoice when one is selected, and confirms with Payment {PE} of {currency} {amount} recorded. In demo mode the payment is kept in this workspace and listed under Payments made with a New badge; the balance tile does not change until the engine is connected.
Reading the statement
The statement of account is the supplier's view of your relationship, so it is the first thing to check when a supplier queries a balance.
- Find the bill
Each bill appears as a Debit line with its bill number in the Reference column.
- Match the payment
Each payment you made appears as a Credit line. The Against column in Payments made shows which bill it settled.
- Confirm the closing balance
The Closing balance row must equal the Payable balance tile. If the supplier's own statement differs, the gap is a bill or payment one side has not recorded.
Purchase orders
Purchase orders are raised against suppliers and appear in two places: the supplier profile above, and the Purchase orders table on the Sales & orders page, which lists PO, Supplier, Date, Total and Status with the statuses To Receive, To Bill and Completed. Receiving the goods moves stock in Inventory; the supplier bill then settles the PO.
Vendors and Bills in Accounting
The finance team sees the same suppliers from the accounts-payable side. Both views sit in the Accounting module's sub-navigation and are documented in full in Accounting.
Vendors (/accounting/vendors)
Titled Vendors with the subtitle Suppliers & accounts payable by vendor · AED. Two KPI tiles show Vendors (with how many carry a balance) and Total payable. The Vendor list table has Supplier, Category, City, Balance and Status columns, and each row's Statement button opens the supplier profile described above.
Bills (/accounting/bills)
Titled Bills with the subtitle Supplier purchase invoices & payables · AED. KPI tiles show Total payable, Overdue (past due date) and Paid bills (as a count of the total). The Supplier bills table lists Bill #, Supplier, Date, Due, Amount, Outstanding and Status. New bill opens a journal entry and Export produces the same columns as the table.
Procure-to-pay in practice
- Check the supplier
Open the profile, confirm the currency and category, and review the payable balance.
- Issue a purchase order
The PO appears under Purchase orders on the profile and on the Sales & orders page as To Receive.
- Receive and bill
When the supplier's invoice arrives it becomes a bill, visible in the profile and under Accounting > Bills, and the statement debits the account.
- Pay and reconcile
Click Pay supplier on the profile, pick the bill and record the payment. It shows under Payments made and on the Payments page with direction Out, and the closing balance falls accordingly.
The list totals convert to USD at 3.67 for a quick cross-currency view, but each supplier's statement is kept in the supplier's own currency. Check the currency in the profile subtitle before you approve a payment.