Getting started
This guide takes you from creating a workspace to raising your first tax invoice. It takes about fifteen minutes. You can invite the rest of your team as soon as the company profile is in place, and add modules later without losing anything.
Your company name as it appears on the trade licence, your Tax Registration Number (TRN) if you are VAT registered, your registered address and the bank details you want printed on invoices. None of it is mandatory to start the trial, but it makes your first documents production-ready.
1. Create your workspace
Open the sign-up page and fill in the short form. There is no card and no waiting: the trial gives you fourteen days with every module unlocked, and the account you create becomes the workspace Owner.
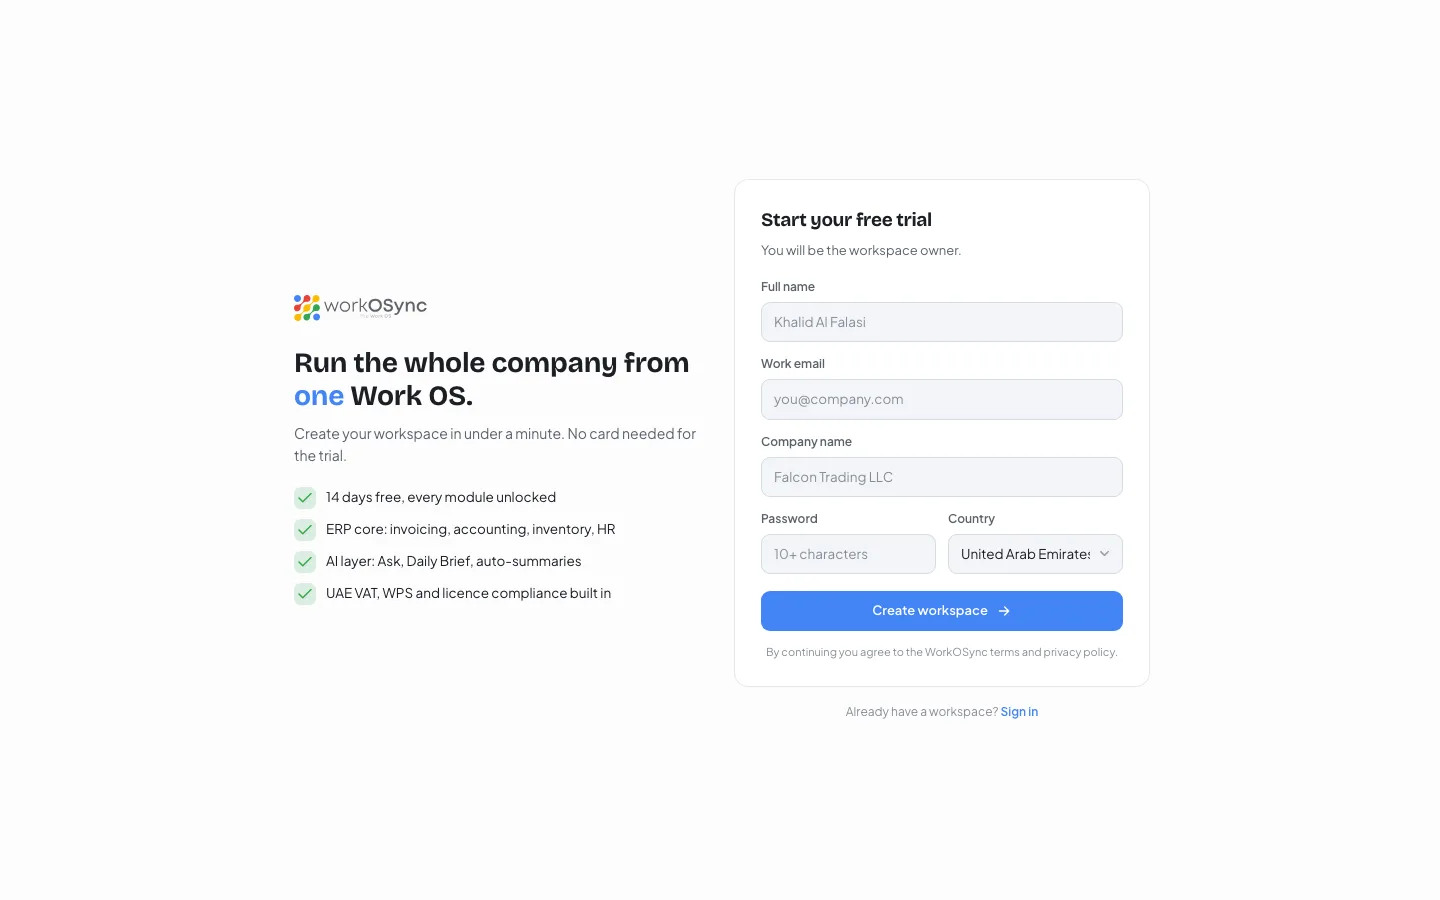
| Field | Notes |
|---|---|
| Full name | Shown on your profile and in chat, approvals and audit logs. |
| Work email | Your login. Use a business address so colleagues recognise it. |
| Company name | The name of your first company (tenant). At least two characters. |
| Password | Ten or more characters. Logins are rate limited and locked out after repeated failures. |
| Country | United Arab Emirates by default, with the GCC, Egypt, Jordan, Pakistan, India, the UK, the US and Other. |
Click Create workspace. You are signed in immediately and land on the Daily Brief. If the form is rejected you see a single generic message; check the details and try again, because the same message is shown whether the email is already in use or a field is invalid. This protects existing accounts from being discovered by trial and error.
2. Sign in
Next time, open the login page, enter your work email and password and click Sign in. If you were sent to the login page from a deep link, WorkOSync returns you to that page afterwards. Sessions last seven days on the device you signed in on, and Sign out in the account menu ends one early.
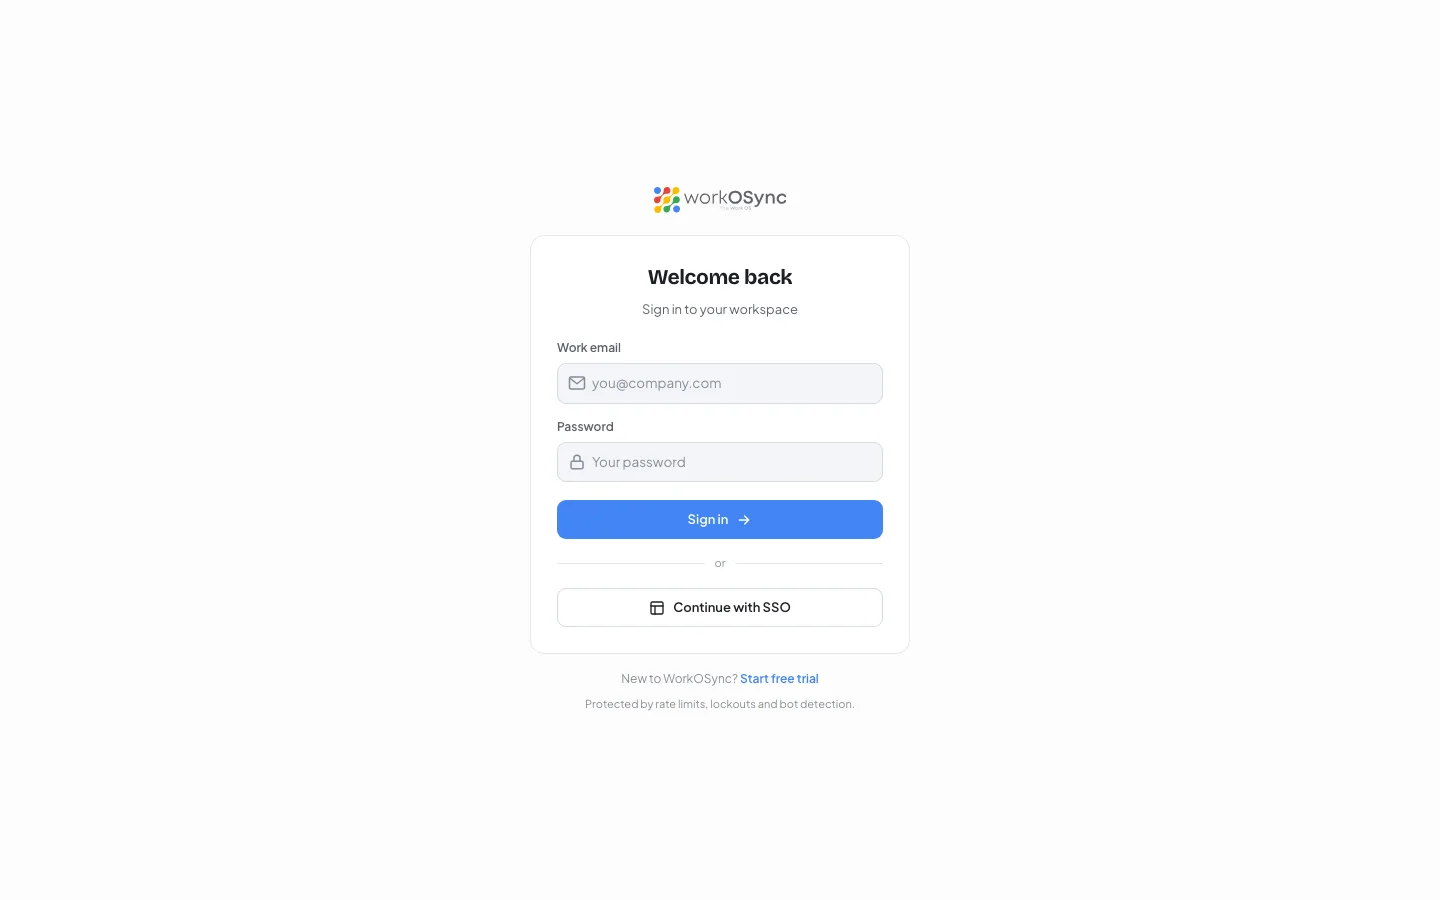
Five failed attempts from one address trigger a fifteen-minute lockout, then twenty-four hours, then a permanent block, and ten failures against one account in fifteen minutes pause that account briefly. The error text is deliberately the same in every case. Wait, then try again with the correct password.
3. Complete the company profile
Open Settings from the System group of the sidebar. The Company profile card holds the details that print on every invoice, quotation and statement.
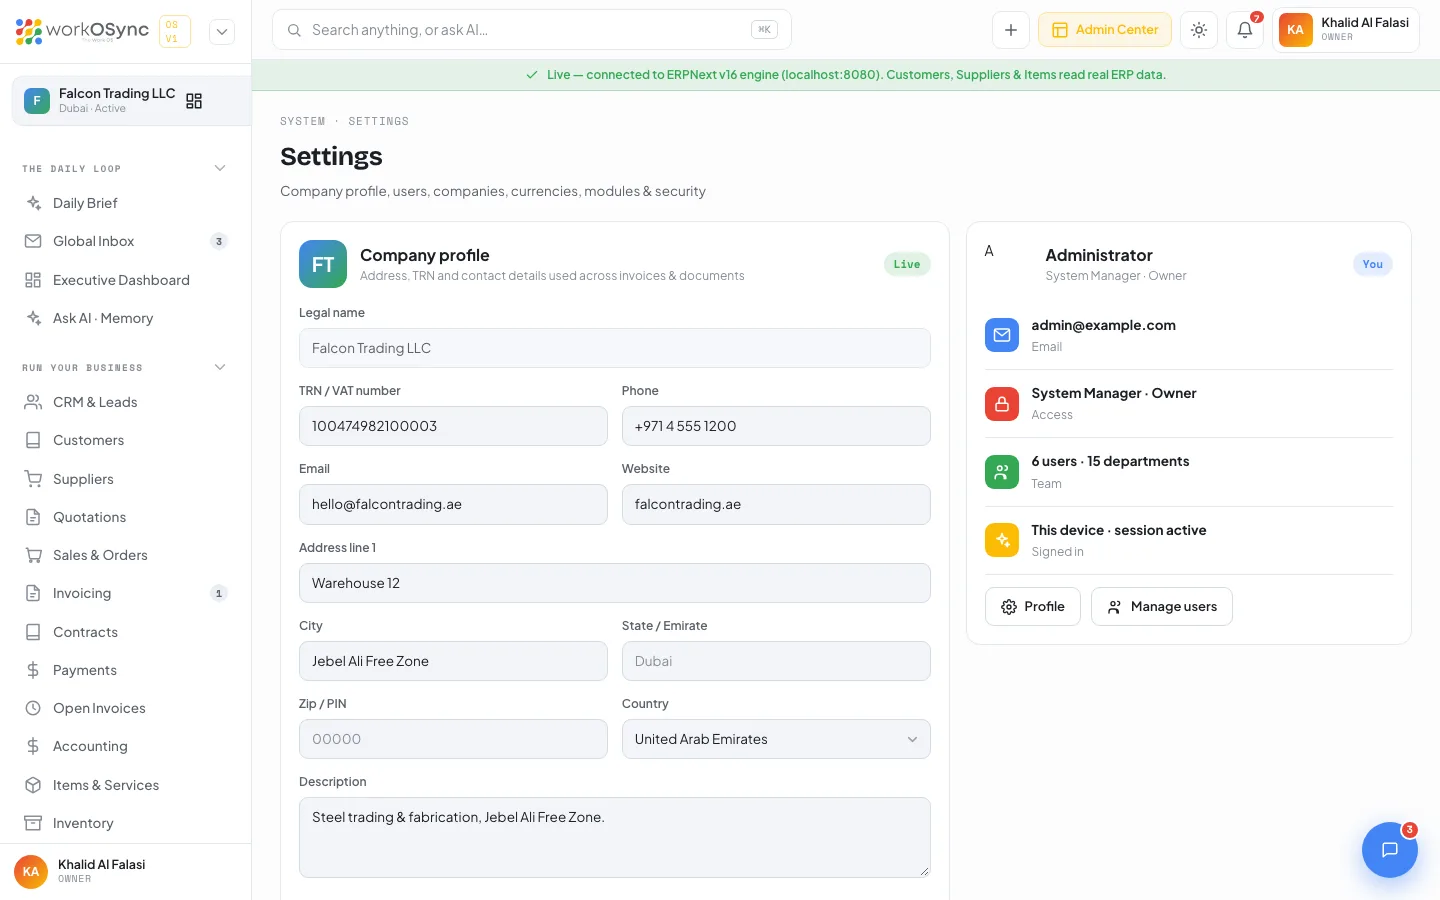
| Field | Why it matters |
|---|---|
| Legal name | Prints on tax invoices, quotations and payroll documents. Read-only here; it comes from the company record. |
| TRN / VAT number | Required on every FTA tax invoice once you are VAT registered. Fifteen digits, starting 100. |
| Phone, Email, Website | Printed in the invoice header so customers can reach you. |
| Address line 1, City, State / Emirate, Zip / PIN, Country | Your registered address for documents. Country defaults to United Arab Emirates. |
| Description | A short line about the business, used on public documents. |
Click Save company details. Further down the same page, pick your Country & tax region (UAE with VAT at 5 percent is the default) and, if you collect card payments, connect a payment gateway. See Settings for every option.
4. Choose your modules
WorkOSync is modular. The Modules switchboard on the Settings page lists every ERP and AI module so you can see at a glance what your workspace includes. Most UAE service businesses start with Invoicing, Customers and Accounting; a trading company adds Inventory and Sales & Orders; a factory turns on Manufacturing.
- Selling and getting paid: CRM & Leads, Customers, Quotations, Sales & Orders, Invoicing, Contracts, Payments, Open Invoices.
- Running the books: Accounting, Items & Services, Inventory, Assets, Reports.
- People and projects: HR & Payroll, Projects, Task Board, Timesheets.
- Making things: Manufacturing with recipes and bills of materials.
- The AI layer: Daily Brief, Global Inbox, Ask AI, Chat, Meetings, One-Tap Approvals and UAE Compliance are available on every plan.
The full list, with a page for each, is in the module catalogue.
5. Invite your team and set roles
Open Users & Access from the sidebar. Each person gets one of eight roles that decides which modules they can open, so salaries stay with HR, the books with finance and the pipeline with sales.
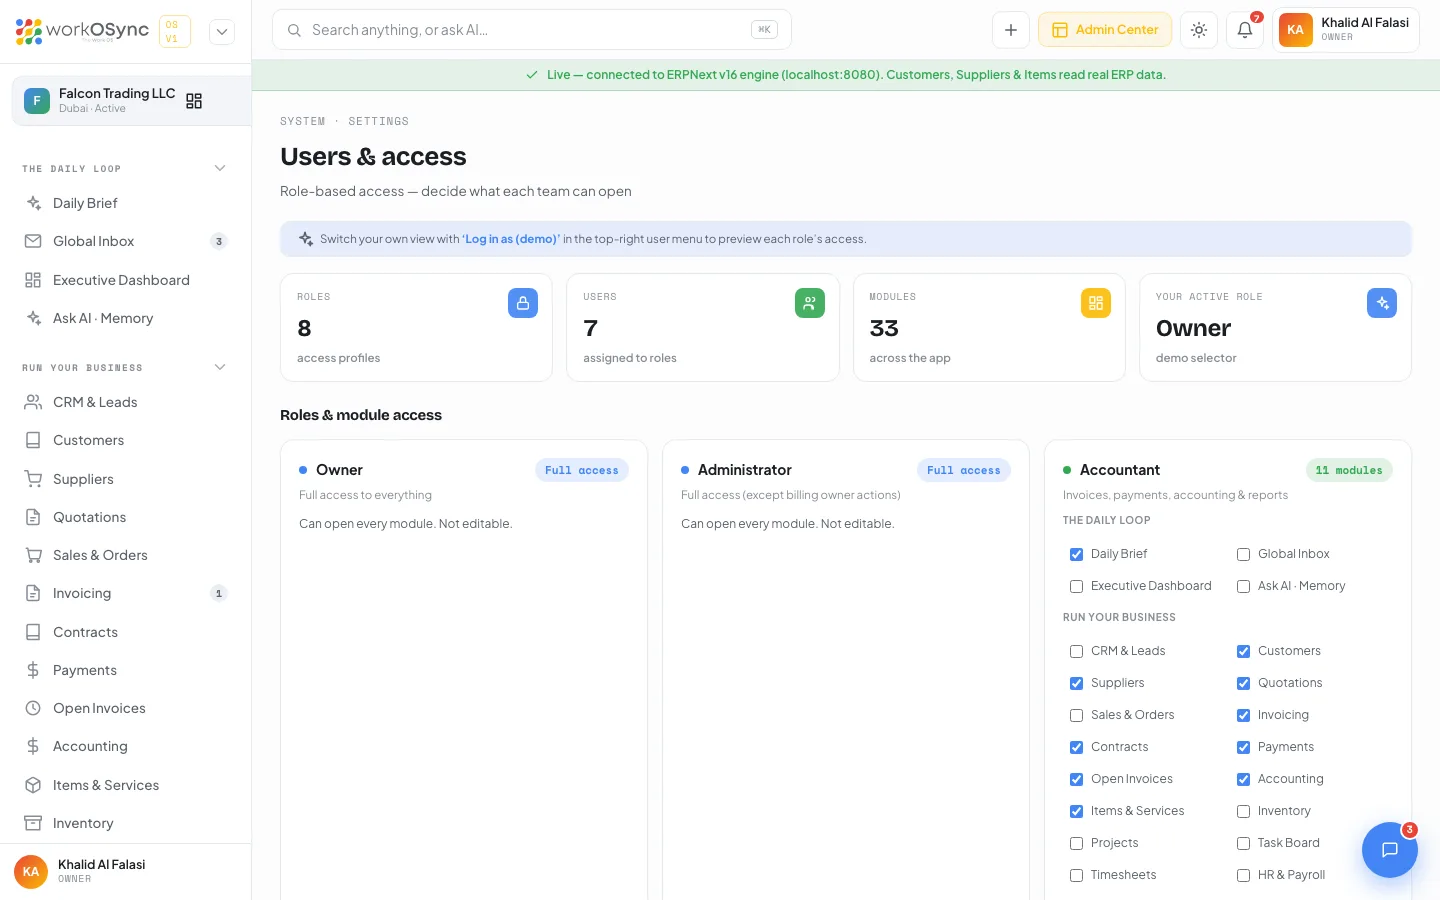
| Role | Opens |
|---|---|
| Owner | Everything, including company settings and access management. |
| Administrator | Everything, for a trusted deputy. |
| Accountant | Customers, suppliers, quotations, invoicing, payments, open invoices, accounting, contracts, reports and items. |
| HR Manager | HR & payroll, timesheets, tasks, approvals, reminders, notes and compliance. |
| Sales | Inbox, CRM, customers, quotations, sales orders, invoicing, contracts, meetings and reminders. |
| Project Manager | Projects, tasks, timesheets, customers, notes, reminders, chat and meetings. |
| Staff | Tasks, timesheets, notes, reminders, chat and inbox. |
| Client | The client portal only: their own projects, invoices, estimates and statement. |
Tick or untick modules on a role card to tailor it, and use Reset to default to undo. Use the Log in as switcher in your account menu to preview any role before you hand it out. The complete matrix is in Roles and permissions.
6. Add customers and items
- Add a customer
Open Customers and click New customer, or press ⌘K and choose New customer. Enter the company name, TRN, contact details, city, currency and credit limit and click Create customer. To bring in an existing list, use Import CSV and the downloadable template.
- Add the products and services you sell
Open Items & Services and click Add item. Give it a description, a rate in AED, a unit and an item group, and tick This is a service for anything that is not stock-tracked. Items appear in the picker on every quotation, order and invoice.
7. Raise your first tax invoice
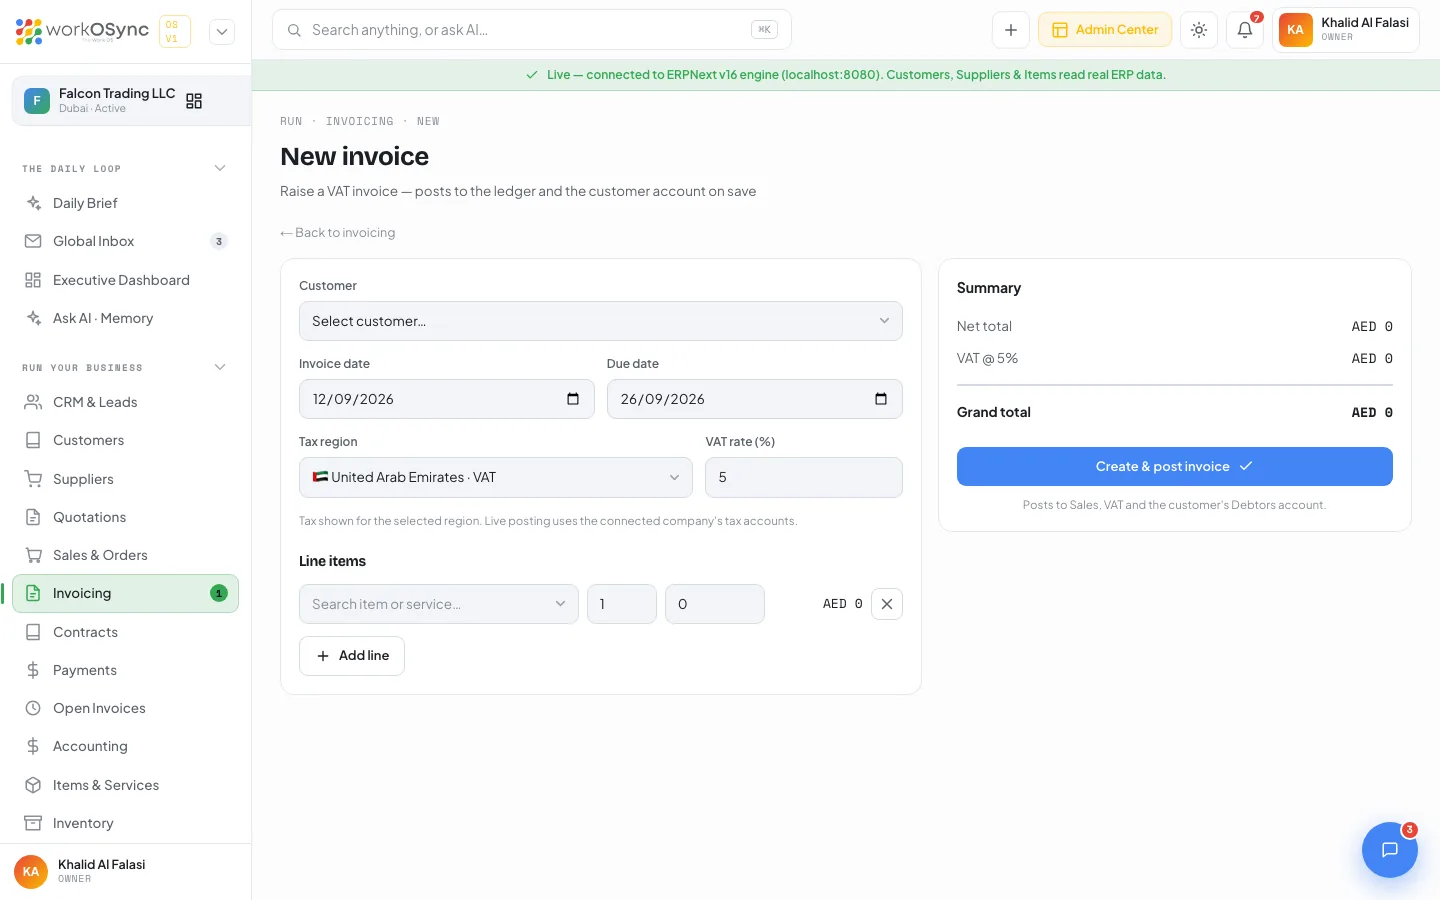
- Open the form
Go to Invoicing and click New invoice. The invoice date defaults to today and the due date to fourteen days later.
- Choose the customer and tax region
Select the customer. Leave the tax region on United Arab Emirates so the invoice carries VAT at 5 percent under your TRN.
- Add line items
Click into a line, search the item picker, set the quantity and rate. Add as many lines as you need; the net total, VAT and grand total update as you type.
- Create and post
Click Create & post invoice. The invoice posts to Sales, VAT Payable and the customer's receivable account in one step and opens as a printable FTA tax invoice.
- Send it and get paid
Use Email invoice or Copy pay link so the customer can view and pay online, then Record payment when the money arrives. The ledger, the customer balance and your VAT figures all update together.
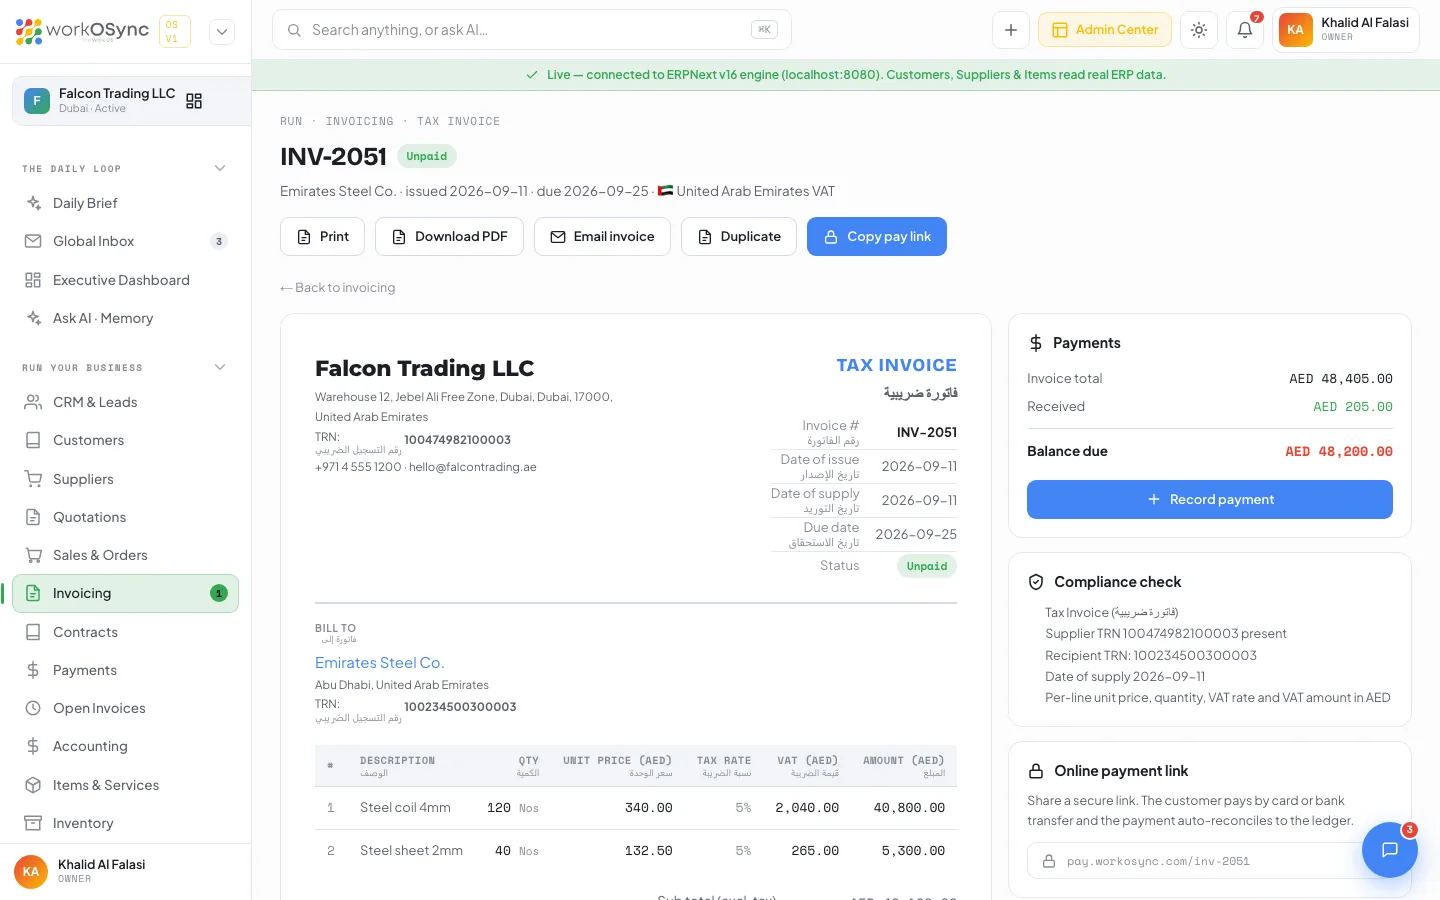
That single invoice now feeds your VAT 201 return, the customer statement, revenue in Accounting, the AR ageing report, the business calendar and your Daily Brief. You entered it once. Learn how in ERP core and the AI layer.
What to do next
- Read Navigating the app to learn the search palette, quick create and the role switcher.
- Connect an AI provider with your own key in Ask AI.
- Add your licence, visa and VAT deadlines to the compliance tracker.
- Review the plans before the trial ends.